Blog
How To Find Lift Supports By Size
Are you looking for lift support struts or replacements for the old lift support hardware? No matter finding lift supports by size or by application
Are you feeling frustrated with installing gas struts? It can be quite a headache, especially if it’s your first time. Dealing with non-standard cabinet or box doors and unclear instructions can lead to unnecessary drilling and unwanted holes everywhere. Don’t worry! This article aims to simplify the mounting process, making the installation of gas struts a breeze, even for beginners.
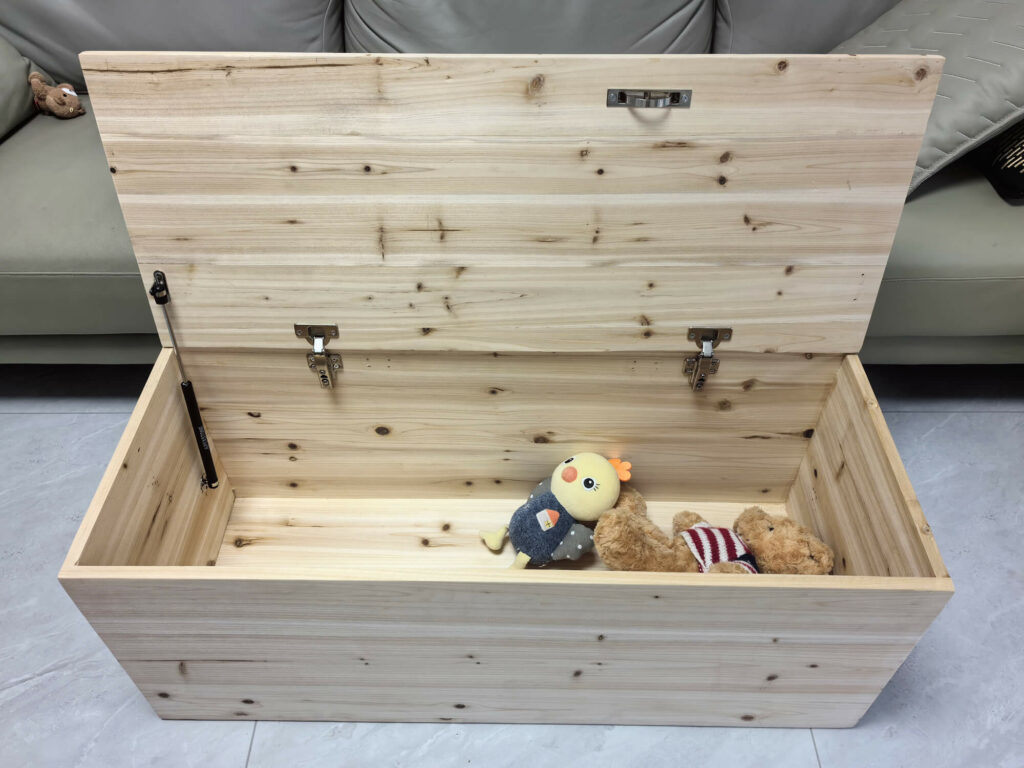
In practice, toy boxes come in various types, such as those with flat lids, deep lids, and more. Regardless of the type of lid you have, choosing the appropriate gas struts is crucial for success.
You might already be aware that gas struts vary in performance and usage. So, when choosing between lift support or damper, consider your intended use first. This could involve lifting, supporting, or slow closing. Lift support shocks lift and support the lid, while dampers specialize in slow closing. Often, your specific application can help guide your decision. For instance, overhead cabinet doors usually benefit from lift support for easy access. On the other hand, toy boxes or storage chests often use dampers to prevent slamming and improve safety. Ultimately, if the performance matches your needs, you’re on the right track.
Now that you’ve selected the gas struts you need, let’s proceed to install them correctly and efficiently. In this section, we’ll provide separate mounting instructions for lift support and damper.
Let’s begin with the lift support gas struts mounting guide for an overhead cabinet door. We’ll break down the mounting process into three steps:
This can be the most difficult part as different sizes of lift support may require different drill points. To make installation easier, consider positioning the upper mounting point around 28-35% of the extended length of the gas struts away from the hinge. For example, if you have a 10-inch gas struts, the upper point should be located approximately 2.8 to 3.5 inches away from the direction of the cabinet hinges.
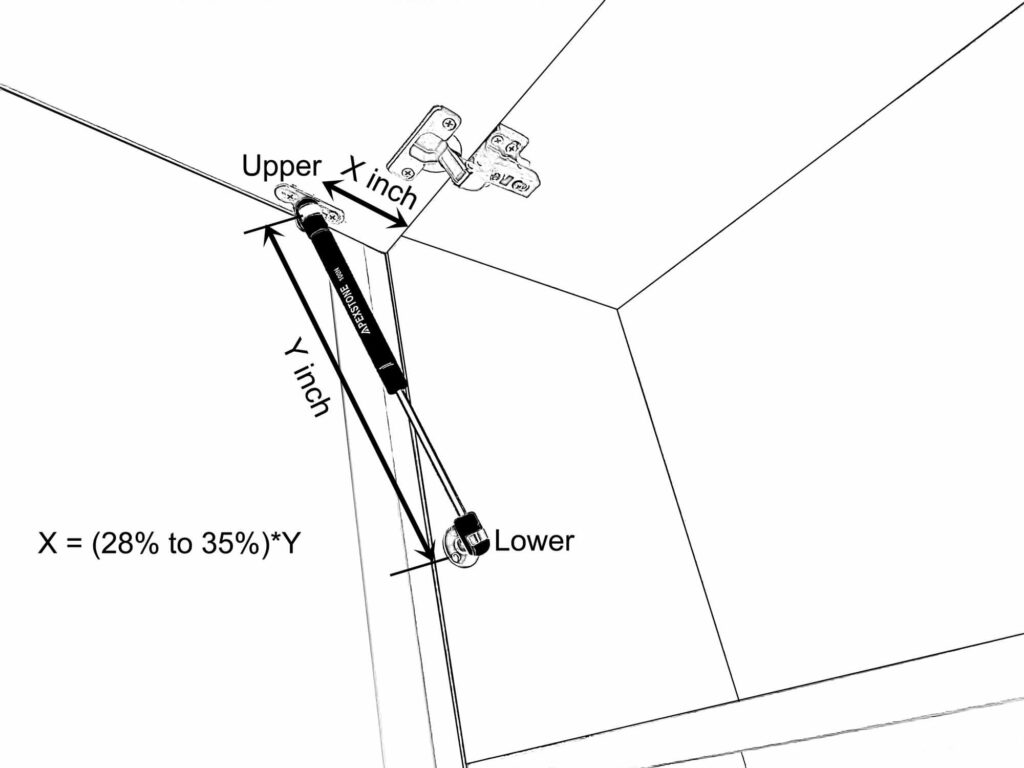
Once you’ve found the upper mounting point, locating the lower one is straightforward because you can see how far the lift support stretches. We suggest installing it more vertically than horizontally with ROD DOWN for optimal performance.
Place the bracket center to the mounting point, secure the brackets with screws. In our initial attempt, we can drill one hole for each bracket. This makes it easier for future adjustments and prevents unnecessary holes all over the place.
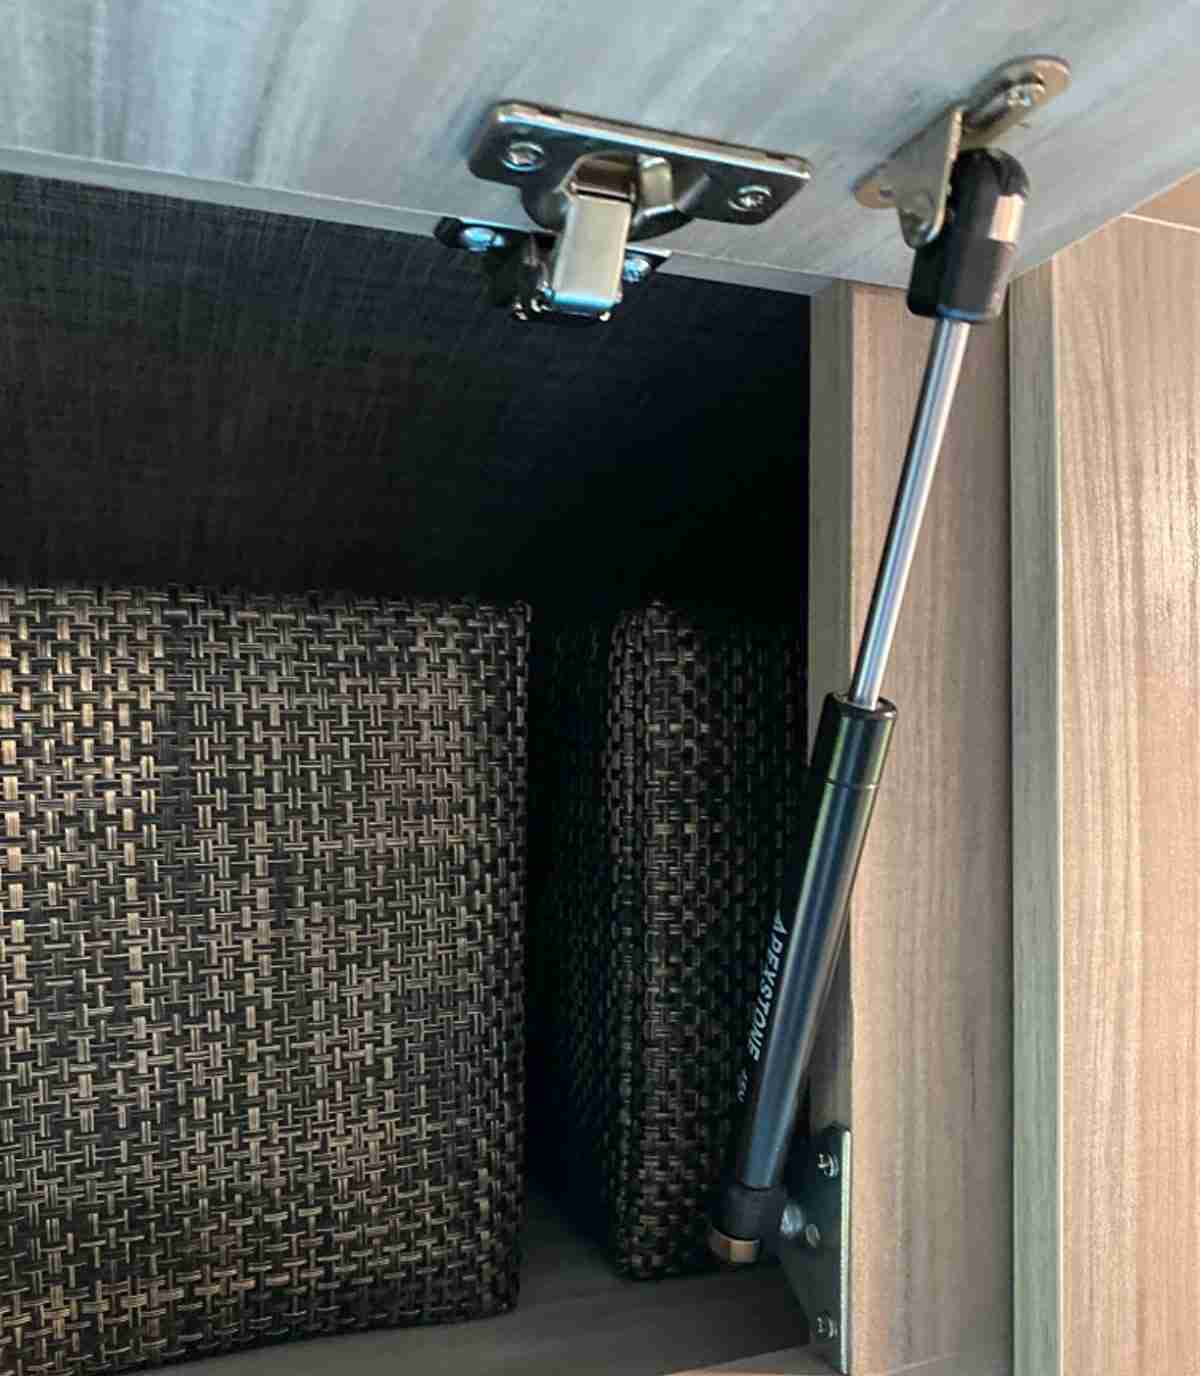
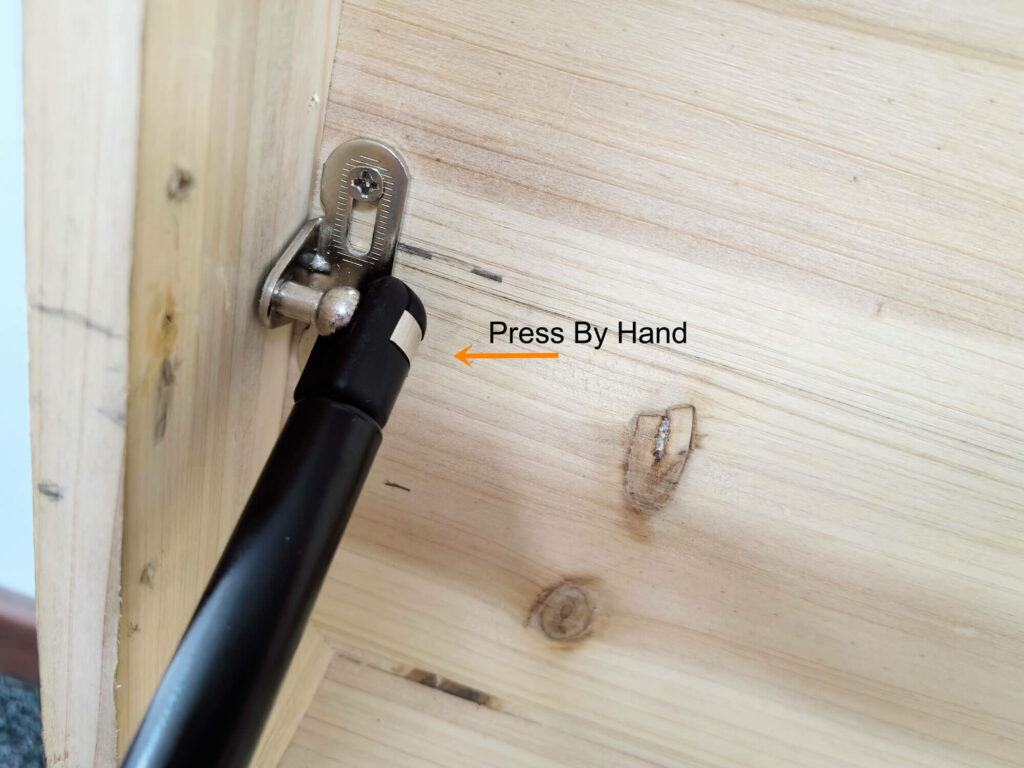
Third, connect the gas struts’ end fittings to the ball stud on the brackets. Take your time with this step, finding the right angle for an easy connection. Once you hear a clicking sound, you’ve successfully connect them.
For better performance and durability, we suggest installing two gas springs. Before finalizing the installation, try opening and closing the door multiple times. This test will reveal the springs’ performance and help you determine whether you need one or two gas springs.
Now, we will move to the mounting process for dampers, which is similar to the lift support mounting process but not identical. We can also break it down into four steps: locating the mounting points, installing brackets, attaching damper struts, and testing performance.
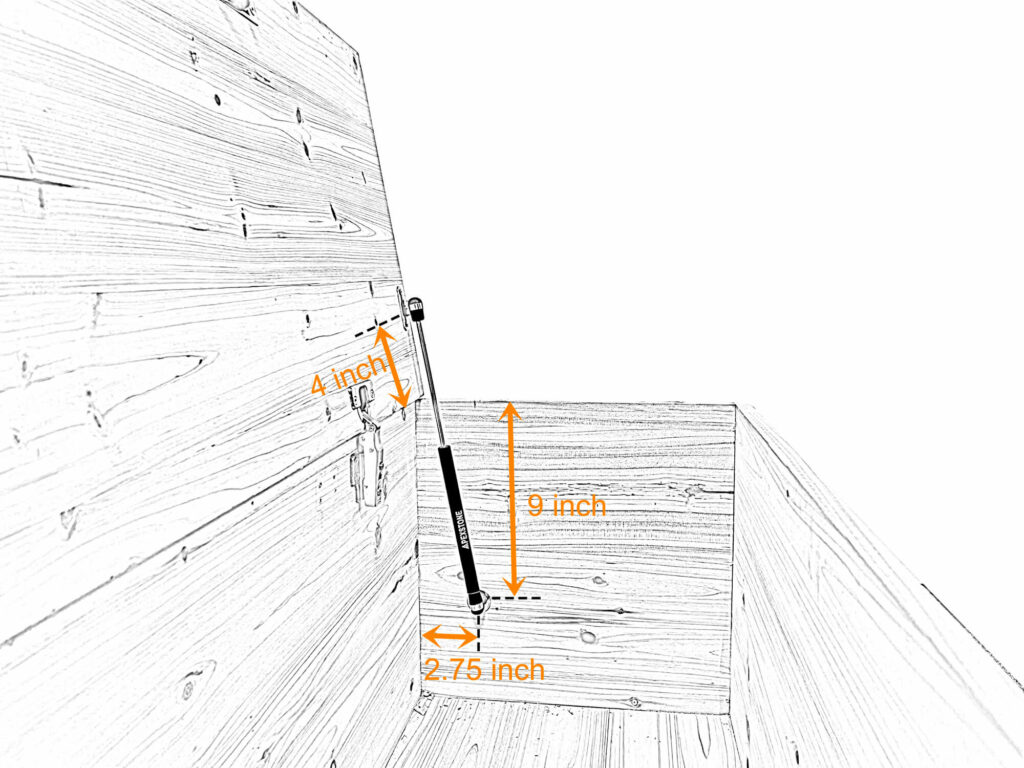
First, find the mounting point. We suggest beginning with the lower one.
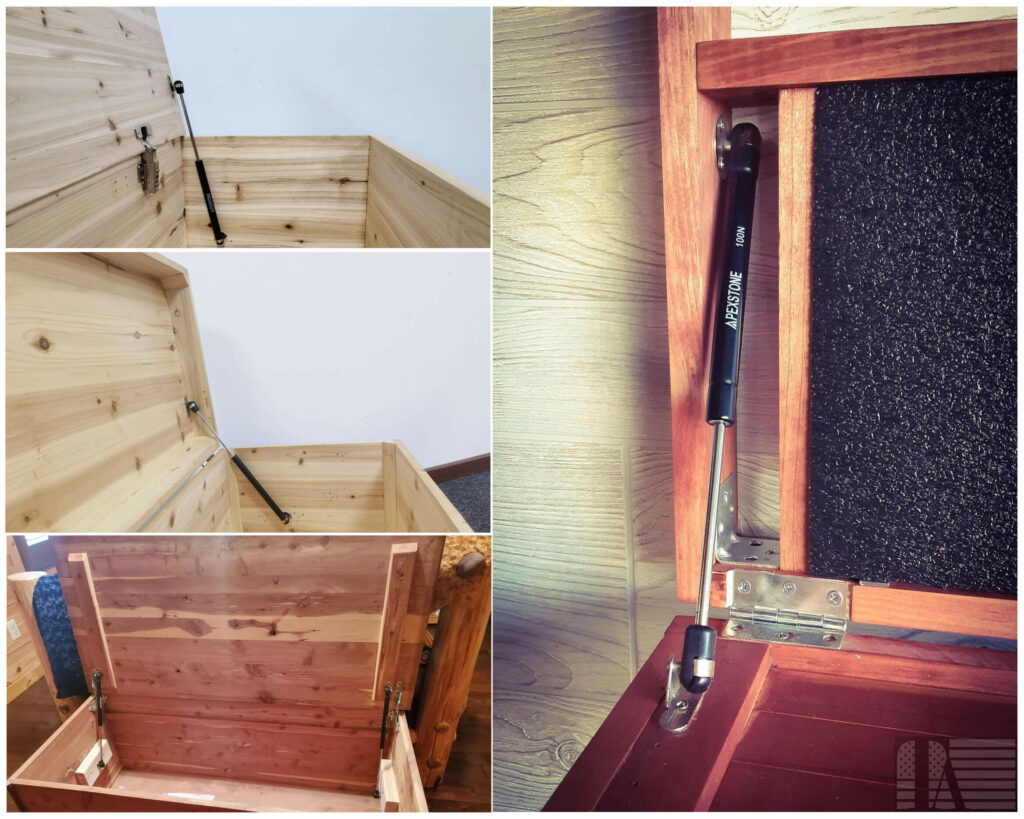
For a flat top lid, it should be approximately 2.75 inches from the back side and 9 inches from the top edge. Extend the slow closing gas struts completely, and you’ll see how far they can stretch to reach the upper mounting point. The distance from the upper point to the bottom edge is about 4 inches.
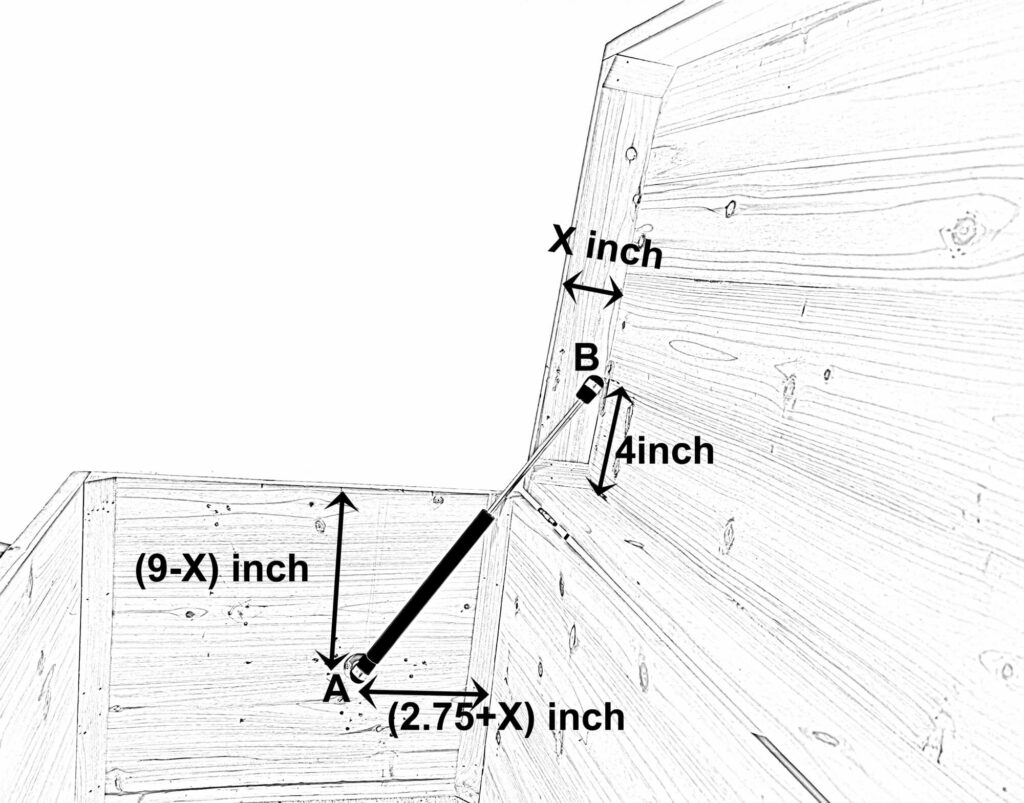
If your top lid is deep, you’ll need to adjust the mounting point to avoid the rod being damaged. Start by measuring the depth of the lid, let’s call it X inches. Then, for the lower mounting point A, it should be around (2.75+X) inches from the back side and (9-X) inches from the top edge. Next, extend the gas struts to see how far they stretch – this will help you find the upper mounting point B, which is about 4 inches from the bottom edge.
Next, place the bracket center to the mounting point, secure the brackets with screws. In our initial attempt, we can drill one hole for each bracket. This makes it easier for future adjustments and prevents unnecessary holes all over the place.
Third, connect the gas struts’ end fittings to the ball stud on the brackets. Take your time with this step, finding the right angle for an easy connection. Once you hear a clicking sound, you’ve successfully connect them.
We’re almost done with 95% of the installation. The final step is to test the performance and determine if we need one or two gas struts.
If your door closes slowly (usually light lids under 10 pounds), great job! A single gas strut should do the trick. However, if the door closes quickly (typically heavier lids over 11 pounds), it’s best to install a pair of slow-closing gas struts. Simply repeat the previous steps on the opposite side.
Haven’t found the right gas struts for your project yet? Explore our diverse selection and discover the perfect fit today!
Are you looking for lift support struts or replacements for the old lift support hardware? No matter finding lift supports by size or by application
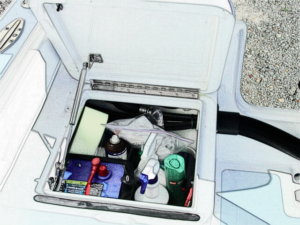
Are you planning to replace the gas struts on your truck toolbox, either by upgrading the toolbox or replacing worn-out struts? Whether you’re getting it