Blog
How to Install Gas Struts on Cabinet and Toy Box Lids?
Are you feeling frustrated with installing gas struts? It can be quite a headache, especially if it’s your first time. Dealing with non-standard cabinet or
Previously, we presented a guide on “how to install soft close gas spring hinges in 10 minutes“. Today, we’re going to share a quick method for installing lift support gas struts. Similar to our previous guide, this strut installation can be accomplished in just 10 minutes. Whether you’re looking to install shocks on a cabinet door, a hatch door, or an RV storage box door, you can streamline the intricate installation process with the following three steps. In this post, I’ll also provide insights into some common errors, assisting you in sidestepping the traps that novices often fall into, aiming for a successful spring installation on your first attempt.
To select the correct gas strut size, we must first gather several measurements, including the extended length, stroke, compressed length, and the required lifting force. I’ll provide detailed explanations in the following diagram, and you can also refer to our article “How to Measure Gas Struts” for a more in-depth understanding.

Doing so will add load force to one side, resulting in an uneven force distribution and reduced longevity.
In reality, we just need to choose a pair of gas shocks that are sturdy enough to support the weight of the lid. Using gas springs with excessive force will make it difficult to close the cabinet door. If you’re facing a situation where the lid won’t close due to high pressure gas struts, our article “How to Address the Issue of Not Compressed Gas Struts” offers a definitive solution for you.
To achieve optimal lifting and support for gas shocks for lids, the most effective approach is to pre-drill holes at the designated installation points as instructed in the paper guide. However, if certain specifications are not mentioned in the mounting instructions, we should consider the specific measurements of the gas shocks, the design of the lid, and the desired opening angle to determine the appropriate gas spring installation point. For an easy way to calculate the gas strut position, you can refer to this resource.
Upon receiving the product, ensure that both ends of the piston head are tightly screwed in. If any looseness is detected, be sure to securely thread the connectors onto the rod threads first.
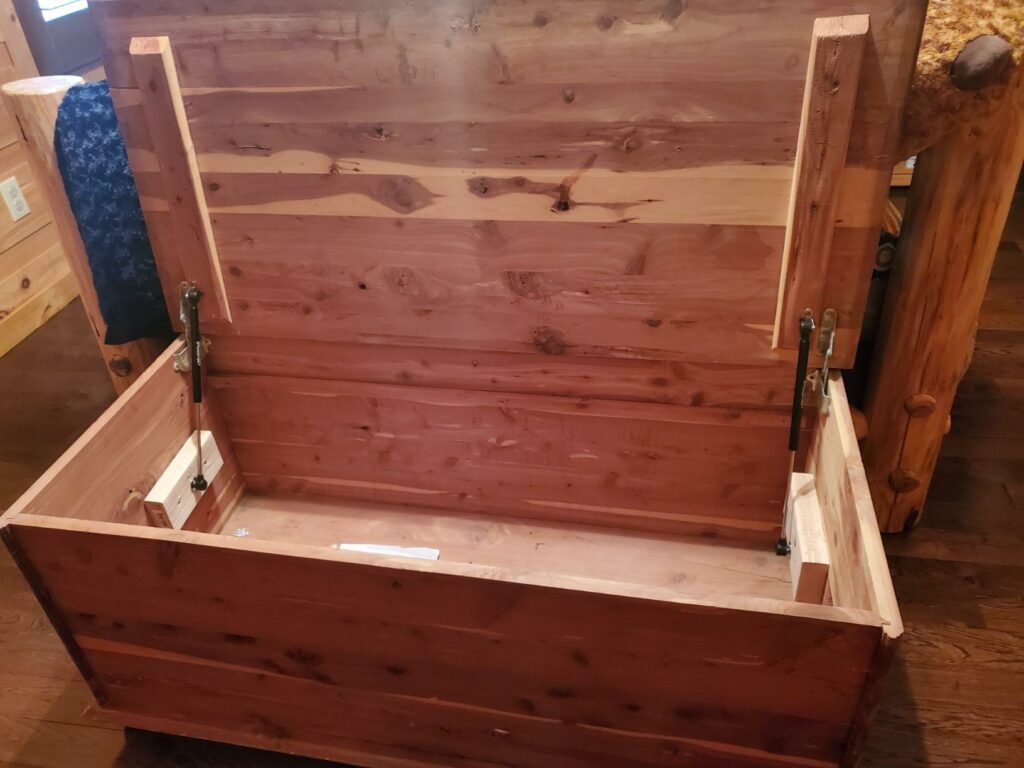
Placing the brackets too close to the edge of the box can hinder the lid from closing properly, especially if the lid has overhanging edges. In general, it is advisable to maintain the upper and lower mounting points as level as possible, while also ensuring that they are positioned away from the cover’s edges.
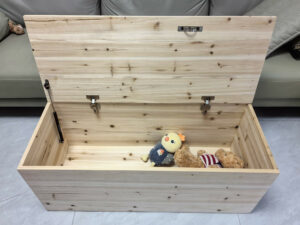
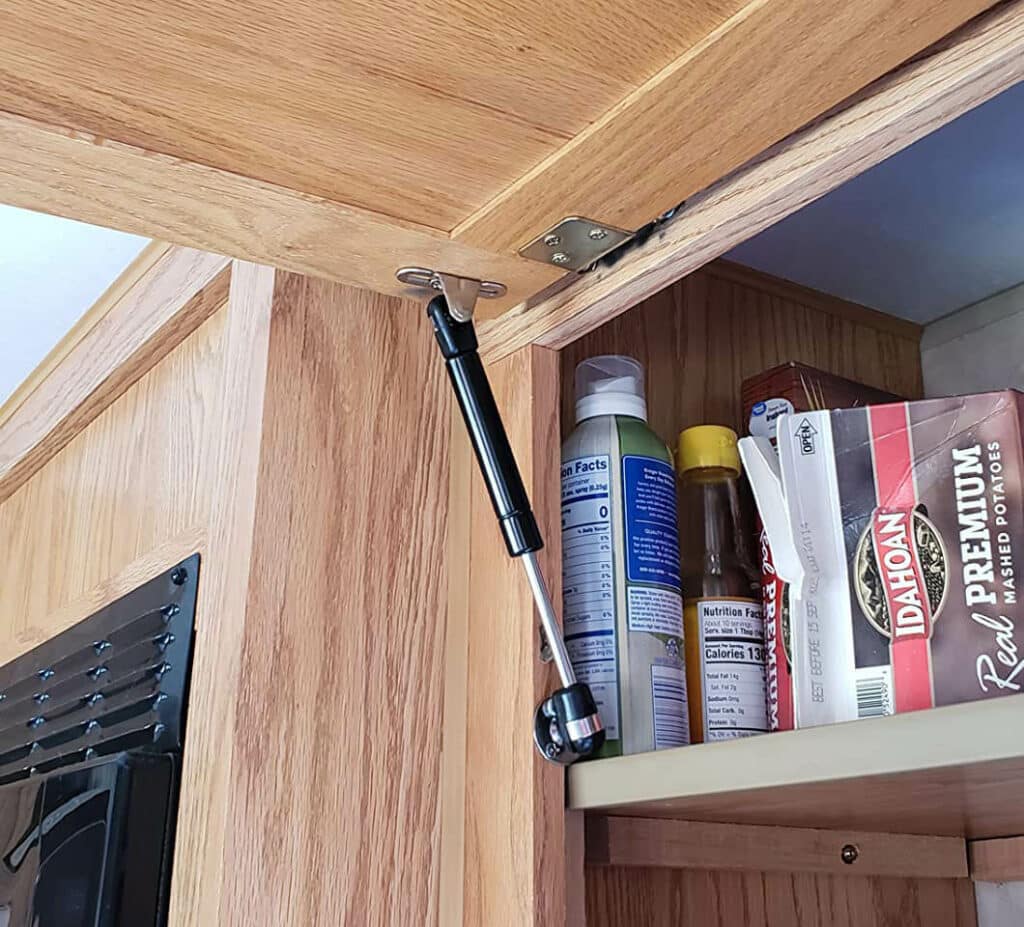
For flip-up cabinet doors, the upper installation point is typically closer to the hinge than the midpoint. Similarly, for flip-top bench storage boxes, the lower installation point is usually closer to the hinge than the midpoint. This will allow the best damping performance.
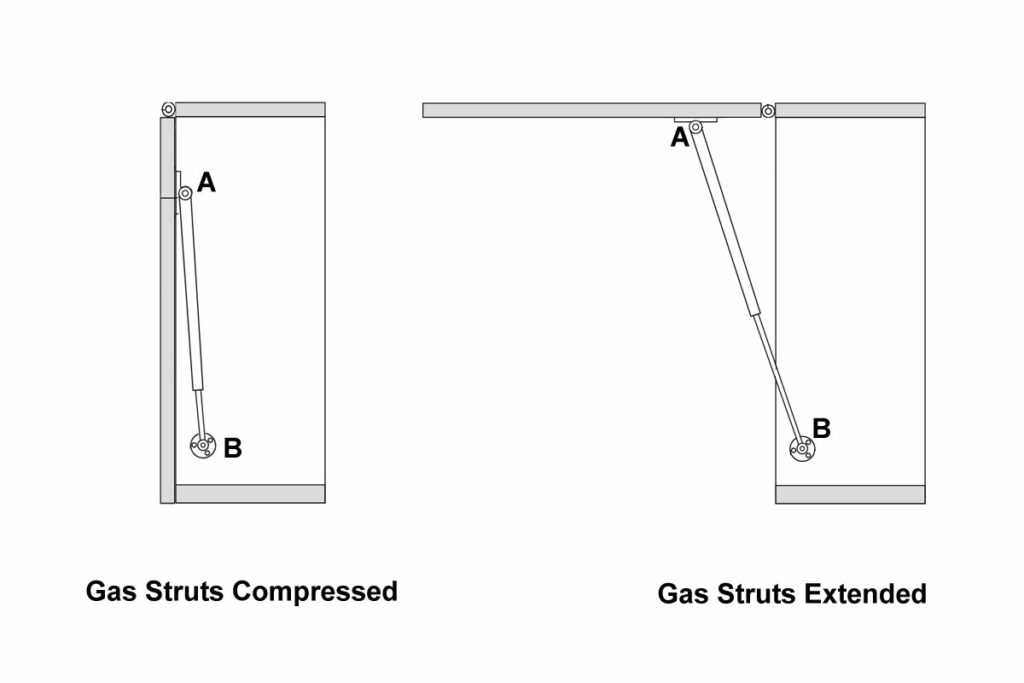
To close the lid correctly, we should leave enough space for the support strut to compress.
To simplify the process, we can position the two mounting points (A and B) at a distance approximately equal to or greater than the compressed length when the lid is closed. For smaller lids that are easy to lift, place point B closer to the side where the lid opens. For larger, heavier lids that are more challenging to lift, position point B closer to the side with the hinges. Measure the strut and mark the mounting points as accurately as possible with the lid closed. Then, install the strut to those marked points with the lid open. It’s important to note that there’s some flexibility, as the strut doesn’t need to compress fully when the lid is closed. You can also refer to the article “How to adjust gas struts mounting point” for a detailed guide.
During the initial drilling process, start with two holes and fit the metal washers. You don’t need to fully tighten the screws at this stage to allow for future adjustments.
Balancing the drilling positions on both sides can prevent any uneven force load.
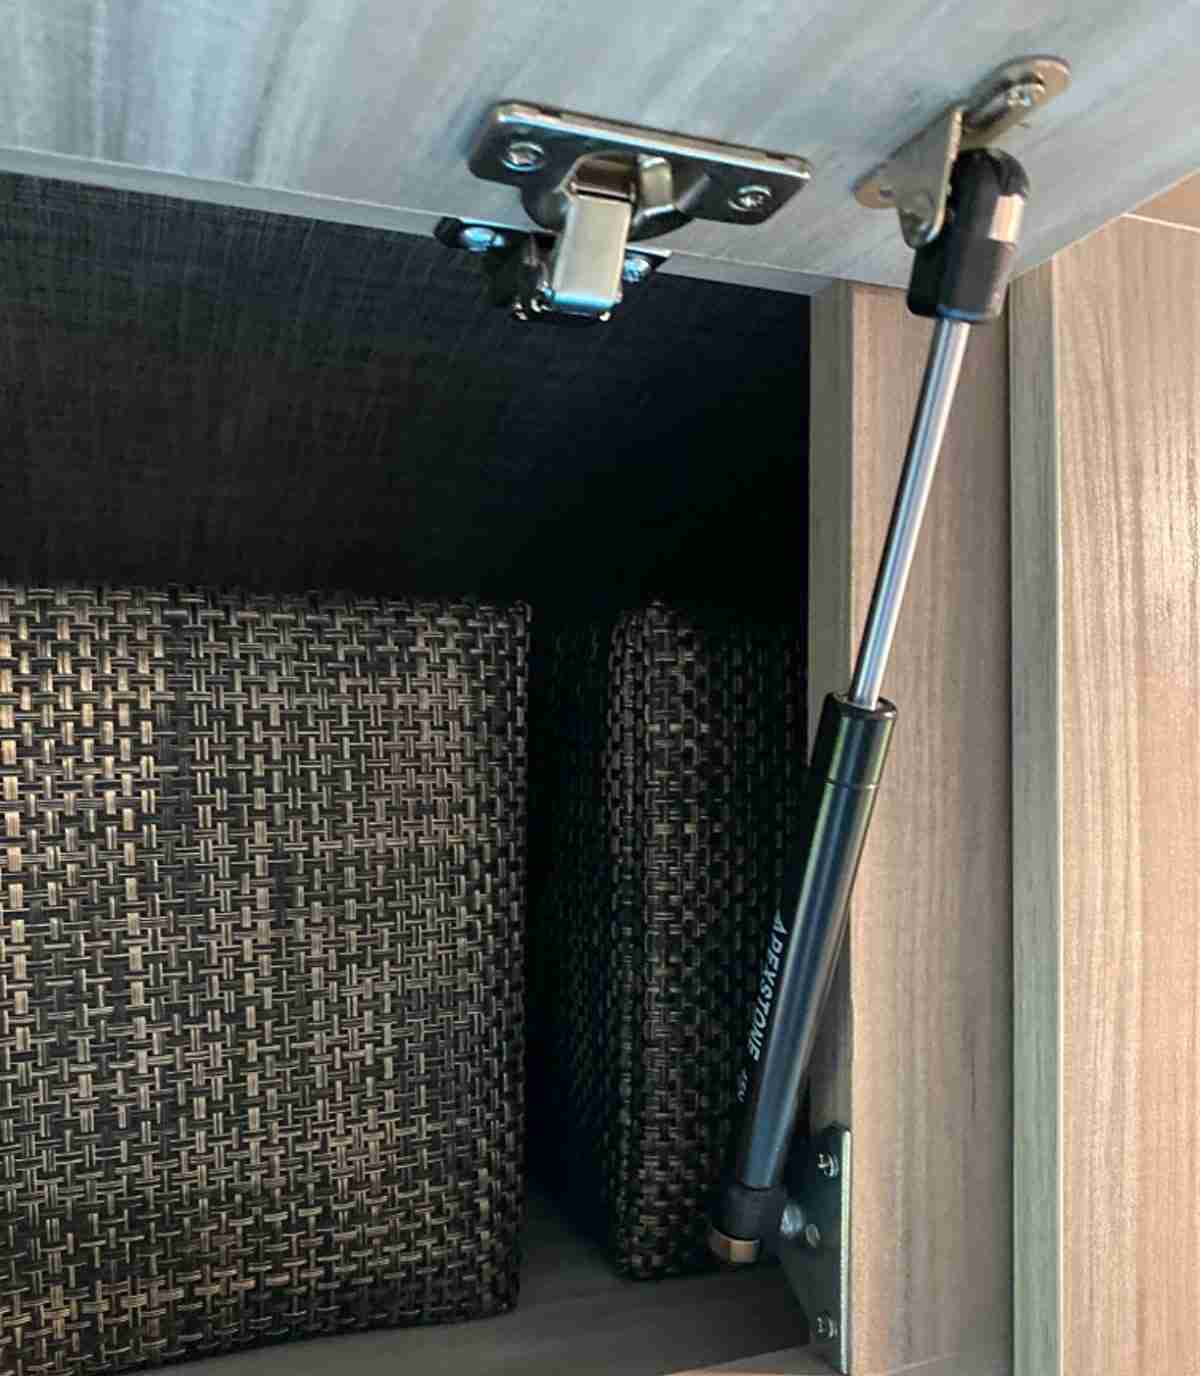
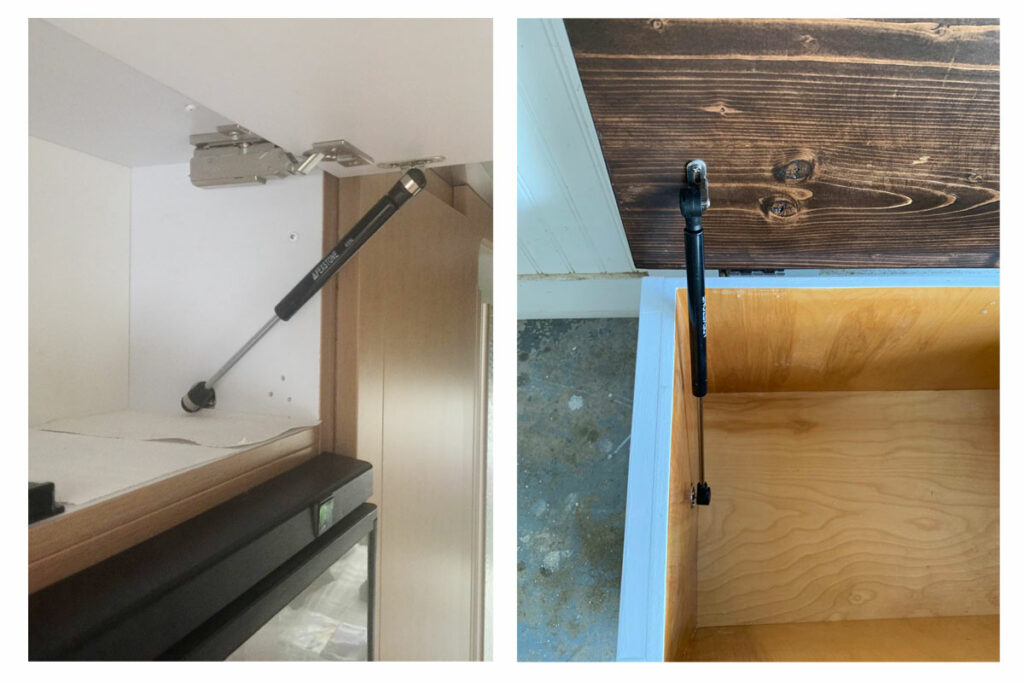
After pre-installing brackets on both sides, the next step is to install the gas struts. Prepare the gas spring with the metal shaft down, then connect the piston head with the ball joint in turn. This step completes approximately 80% of the installation. Then, we can test the performance by opening and closing the lid cover multiple times to ensure smooth operation and secure joint connections. If the door opens and closes without any issues, it indicates a successful setup. Finally, proceed to drill and secure the screws in the remaining bracket holes, marking the true completion of the installation.
Additionally, to extend the lifespan of the gas struts, consider the following guidelines, even though box shocks don’t require specific maintenance:
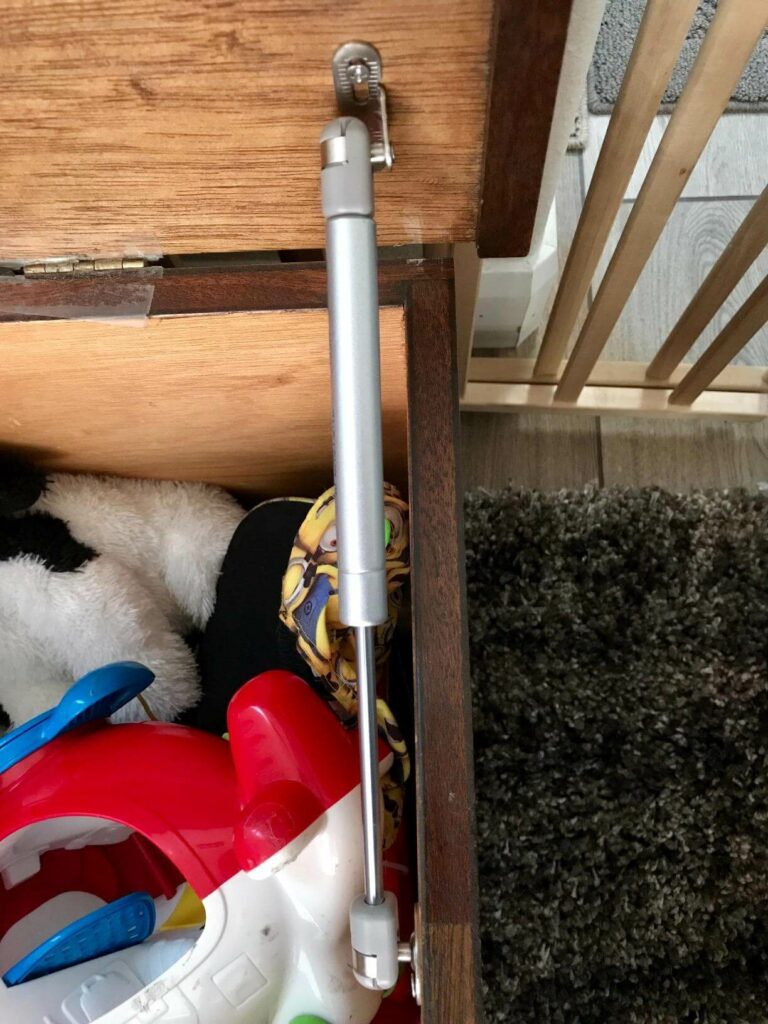
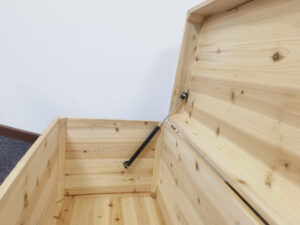
1. Always position the rod facing downward. This helps lubricate the gas strut accessories and enhances damping performance.
2. Protect the piston from damage, dirt, and paint.
3. Install the struts in a dry environment.
4. DO NOT try to manually compress the gas struts, as this may result in rod bending.
I’m confident that this article will guide you through the lift support installation effortlessly. Should you have any queries about installation or product selection, our FAQ section contains answers to common user questions that may address your concerns. Alternatively, feel free to reach out to us at alvinluo2013@gmail, and we’d be delighted to assist with any questions you may have.
Finding Gas Struts for Your Great Projects? Click the button below.
Are you feeling frustrated with installing gas struts? It can be quite a headache, especially if it’s your first time. Dealing with non-standard cabinet or
A lid weighing less than 11 pounds can be considered lightweight. If you’re preparing to mount Apexstone soft-close toy box hinges, we’ll provide tips to