Blog
How To Find Lift Supports By Size
Are you looking for lift support struts or replacements for the old lift support hardware? No matter finding lift supports by size or by application
Got a troublesome SentrySafe gas strut?
Look no further! With input from 80 customers and extensive testing, this guide is your quick ticket to resolving the strut problem in just five minutes.
Content Table
I. Introduction
II. Tools and Materials to Prepare
III. Safety Precautions
IV. Diagnosis- how to identify a weakened piston
V. Step-by-Step Repair Guide
VI. Troubleshooting Tips
VII. Maintenance Tips
VIII. Conclusion
When it comes to SentrySafe gun safes, I believe that most people have more positive experiences than negative ones. This small biometric gun safe is ideal for most families. Because our primary purpose of using this safe may not be to stop people with bad intentions or criminals, most models like QAP1BE are not the type of small gun safe we would rely on to secure firearms from malicious intent. Instead, it serves as a means to keep children, the curious, or prying eyes away from its contents. Other people can’t easily access this safe unless they know the combination, have the keys, or can unlock it.
Moreover, it allows us to swiftly access our weapons in case of any disturbances during the quiet hours of the night. This is its most significant feature, as it ensures the safety of ourselves and our loved ones.
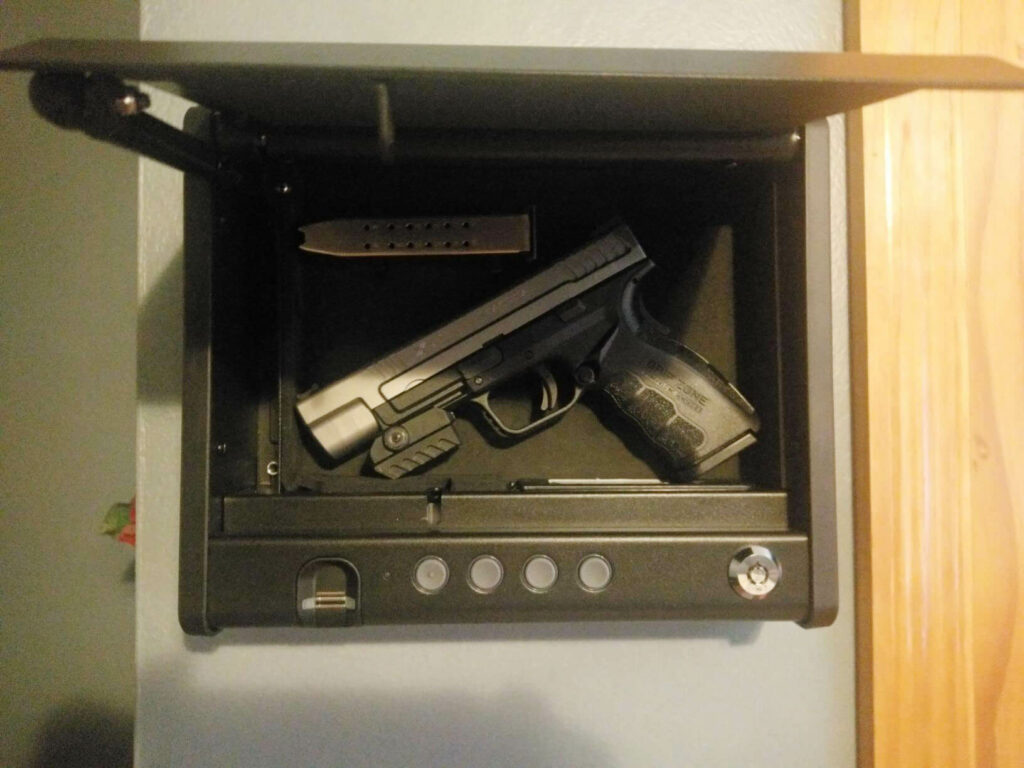
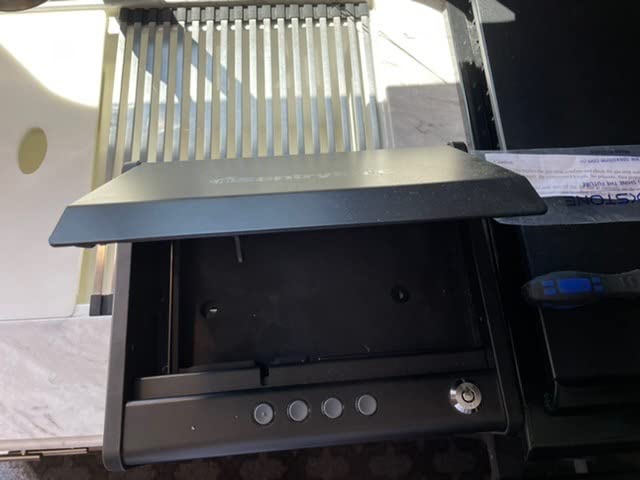
In the one year I’ve owned SentrySafe QAP1BE, I’ve only had to replace the batteries once, and it consistently performs well in various situations. However, the only issue is that after about the second year, or even longer, the lift support strut started weakening gradually. It began opening slower, and eventually, it barely popped open at all. I had to wiggle my finger into the side gap to assist its opening.
As we all know, slow access is not a problem to procrastinate with, as our goal is to keep our weapons secure and ensure our safety. Now, we will discuss the guide further in the complete text. Let’s get started.
Tool and materials list:
1. 7.68 Inch strut replacement
2. Philips #2 screwdriver
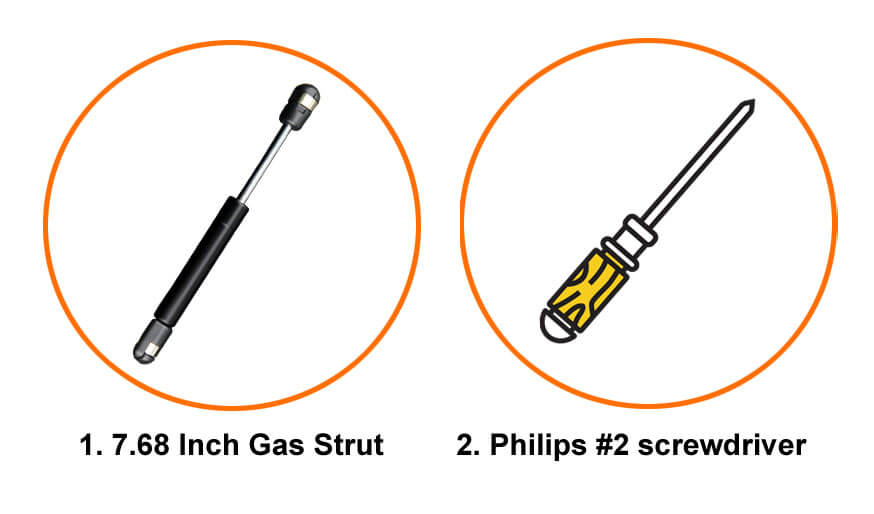
For this step, we only need to prepare two items for the repair process. The first thing is a gas strut because it cannot be fixed, once the pressure is lost, we must replace the old one. The 7.68-inch specification has been recognized as the best size by many users, and it is also considered as well-fitting SentrySafe replacement part. You can click the gas struts replacement to place your order directly.
The second one is the Philips #2 screwdriver, which will assist us in efficiently removing and reinstalling the gas shocks.
Throughout the entire operation, it’s essential to keep in mind that, despite the weakening of the lift strut’s pressure, it remains under high pressure inside. We must avoid any actions, such as scratching, denting, chipping, bending, or painting, that could be perceived as damaging, as these actions could potentially result in accidents and injuries. Learn more actions that may ruin your gas spring here.
The process of reducing strut pressure can be divided into two stages.
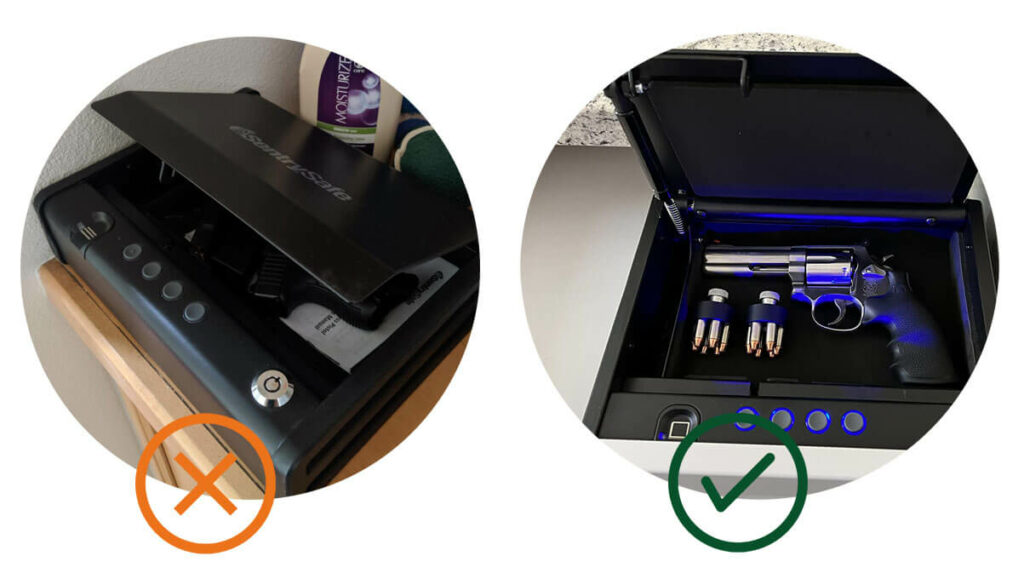
1. Early Stage: At first, as the pressure begins to decrease, you may observe that the fingerprint gun safe lid doesn’t open as forcefully as before. Sometimes, it may only open partially, about 3/4 of the way.
2. Advanced Stage: In the later stage, when a substantial amount of pressure has been lost, it won’t be enough to support the lid, and you’ll have to manually lift it open.
Around two-thirds of our customers have reported that they observed the lid opening more slowly in the first stage. However, at this point, the lid can still open adequately, so they didn’t see it as a problem. It’s only in the second stage that they start to consider it an issue. During this stage, their primary worry is the potential for an emergency situation. Slower access to their firearm could pose a risk to their safety.
So, the key to identifying the lost pressure is to observe how quickly the lid opens each time you access the contents inside.
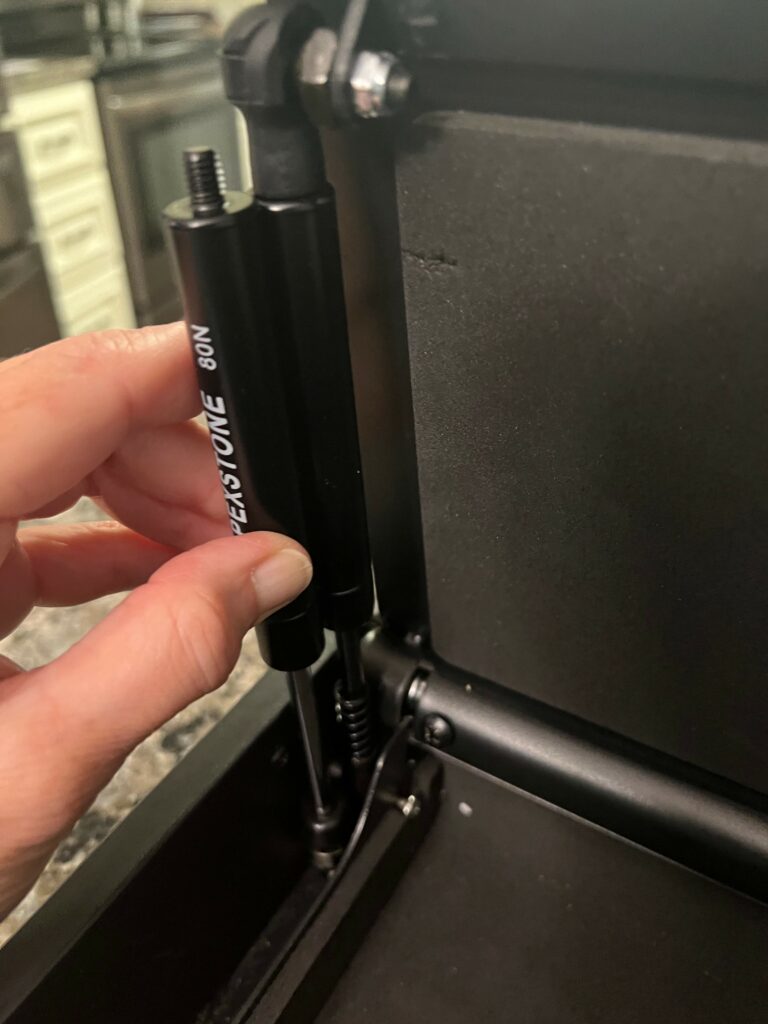
For XiangJun gas strut replacement, the most suitable specification is the Apexstone 7.68-inch 80N gas strut replacement. It can assist you in quickly accessing the hidden gun safe, maximizing the safe’s effectiveness and value. Don’t wait! Place an order and enjoy free shipping for one piece today!
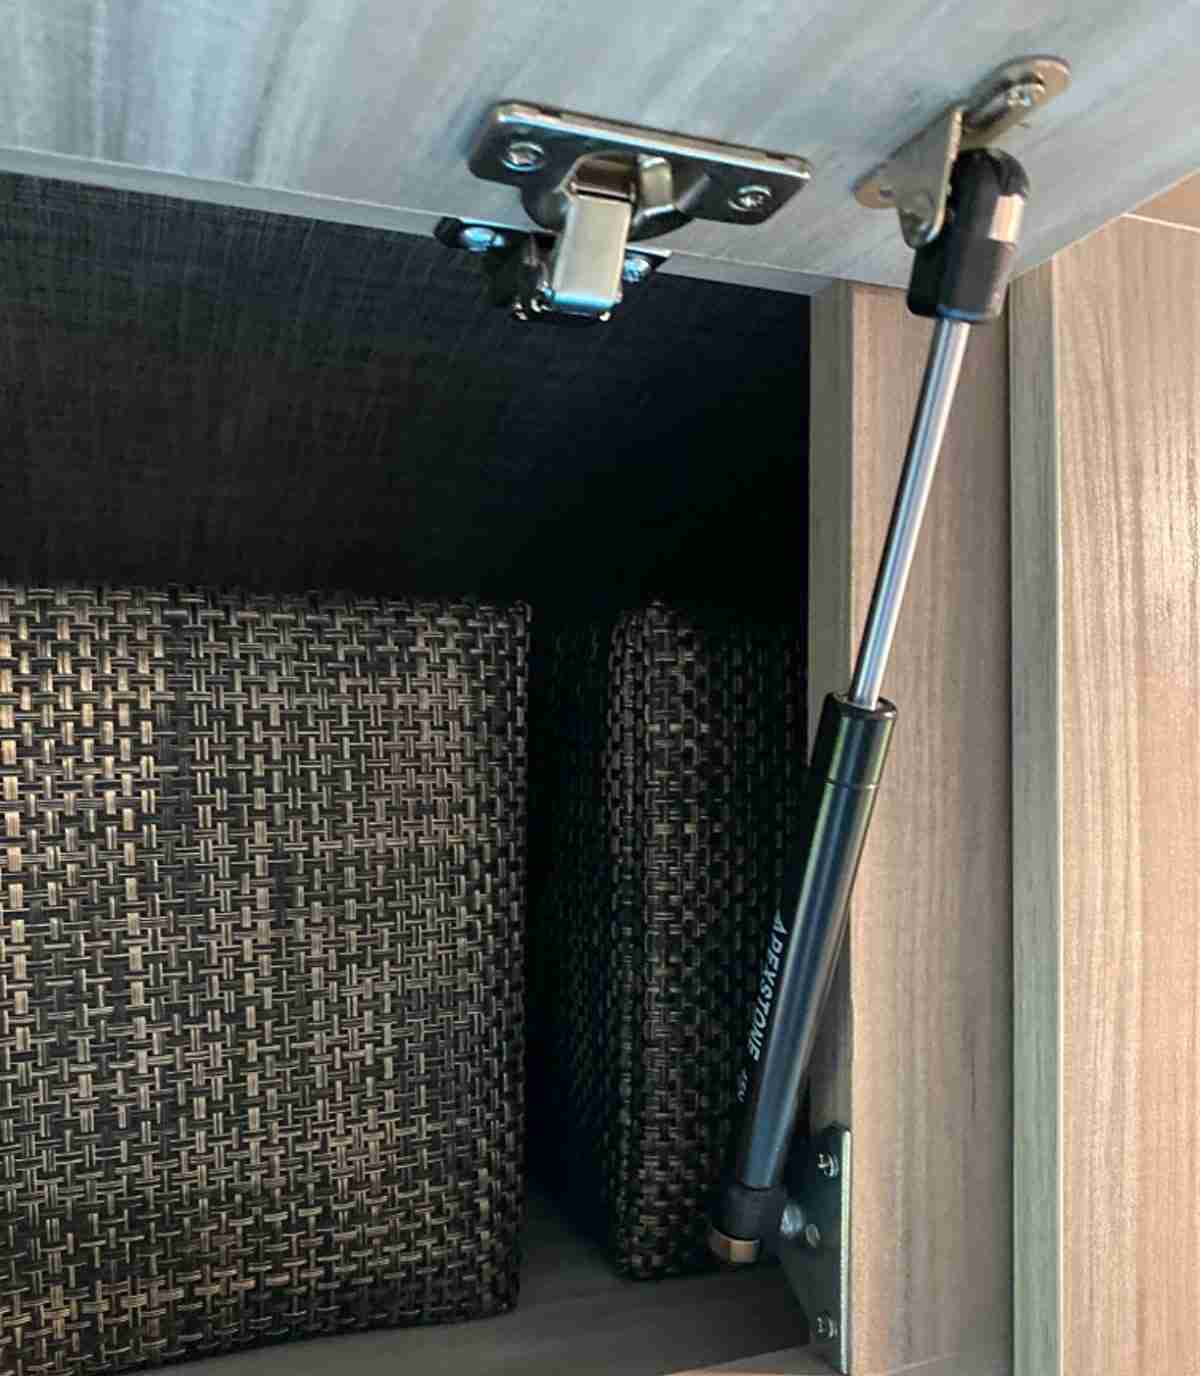
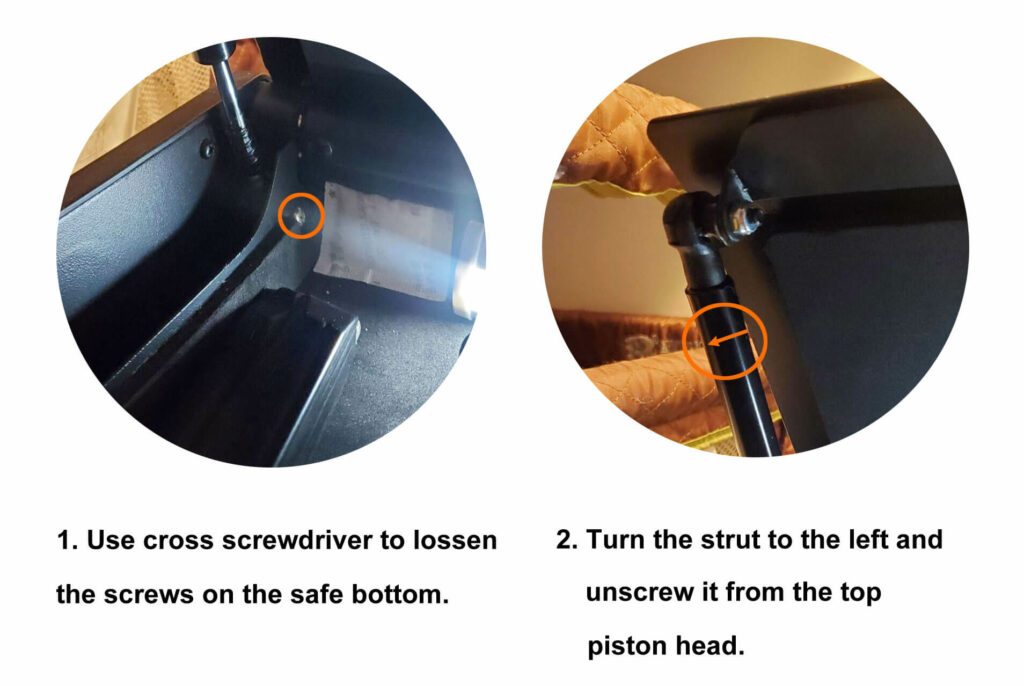
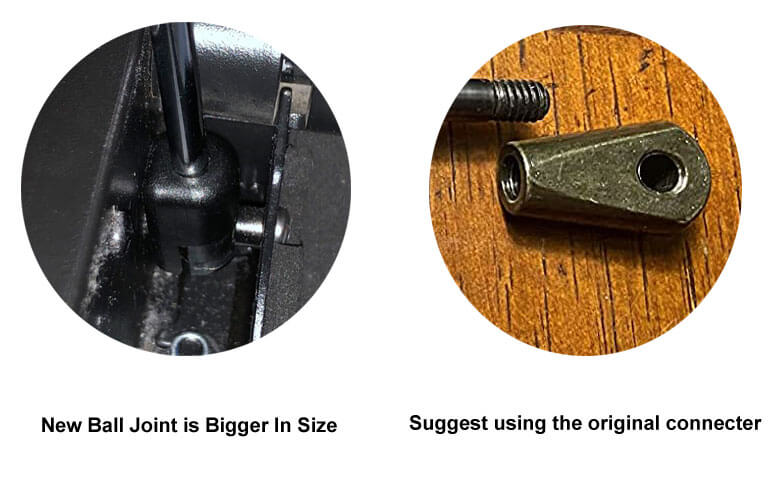
At this point, the screwdriver comes into play. The screwdriver is used to unscrew the bottom fixed screws. Then we need to turn the strut to the left and unscrew it from the top piston head. This is the easiest way to remove the failed gas strut, Do Not need to remove the top nut, just retain the original connector from SentrySafe. From a convenience perspective, it is recommended to operate in the sequence of the bottom first and then the top.
After removing the weak strut, remember to unscrew the bottom ball joint of the gas strut and the little compression spring, we need to keep it for the next installation step.
After unpacking the product packaging sent by Apexstone, we only need to take out one piece of micro gas spring, while the rest of the accessories can be kept at home as tools for future use. Then, we’ll remove the ball joint from both ends of the new piston, leaving us with just one rod. Now, let’s begin the installation process:
1. Prepare the new strut with the metal rod down, and attach the top screw thread to the strut joint installed at the top of the lid by turning the rod to the right to secure it.
2. In sequence, place the compression spring back on the bottom rod and attach the bottom screw thread to the original joint.

3. Place the installed piston’s bottom end back into its original position and screw it back in place.
4. Testing the repair by closing and opening the safe lid. If the lid can fly open like it used to when opened and the closing process is smooth, it indicates that we have succeeded.
If you need to use the new connector from Apexstone, you’ll notice it’s slightly larger than the OEM connector. Besides, it will rub and cause clearance problems. You will find that when you open the safe, the lid will hang up or open slowly. This is because the 7.68-inch shock serves for many gas spring applications – it can function as a cabinet lift support and its rod can seamlessly replace the OEM rod in the SentrySafe piston. The solution is simple: continue using the OEM connector. This way, you can avoid removing the existing upper connector on the safe lid, saving valuable time.
During the replacement process, some customers have encountered rusted or damaged springs at the bottom. In such cases, we recommend buying a small box of springs from a hardware store. They are cost-effective, typically priced at less than $5 for a box containing approximately 100-200 springs. Replacing these small springs can also enhance the overall speed of the opening mechanism.
The gas piston inside the biometric gun safe generally requires minimal maintenance, because it is isolated from moisture and dust, thus eliminating the need for regular cleaning. Nevertheless, remember these key guidelines:
1. Always orient the metal rod downward-facing in use.
2. Refrain from intentionally damaging it.
3. Plan for occasional replacements, typically every 1-3 years.
I’ve gained valuable insights into fingerprint gun safe gas spring repair during the replacement process, and I sincerely hope this straightforward guide proves beneficial for you. If you’re short on time, you can concentrate solely on Section V – Step-by-Step Repair Guide. I’m confident that even on your first attempt, you can repair it within 5 minutes by replacing the gun safe accessories. However, always prioritize your safety when handling tools and take care not to damage the old piston rod. If you have better methods for the repair process or any questions, feel free to contact us at [email protected].
If you find this guide helpful, please consider sharing it with your friends to extend its assistance to more individuals. Together, we can help more people with their repair needs.
Are you looking for lift support struts or replacements for the old lift support hardware? No matter finding lift supports by size or by application
Are you planning to replace the gas struts on your truck toolbox, either by upgrading the toolbox or replacing worn-out struts? Whether you’re getting it